Overview
Workspaces are the top-level organizational unit in MartechAI. Each workspace contains its own projects, campaigns, contacts, and integrations — completely isolated from other workspaces. This makes MartechAI ideal for agencies managing multiple clients, or businesses with distinct brands or departments.
Step 1: Navigate to Workspace Settings
From the Dashboard, click the gear icon (⚙️) in the top banner, then select Manage Workspaces from the dropdown. This takes you to the Account Configuration page where all workspace management happens.

Step 2: Click “Create Workspace”
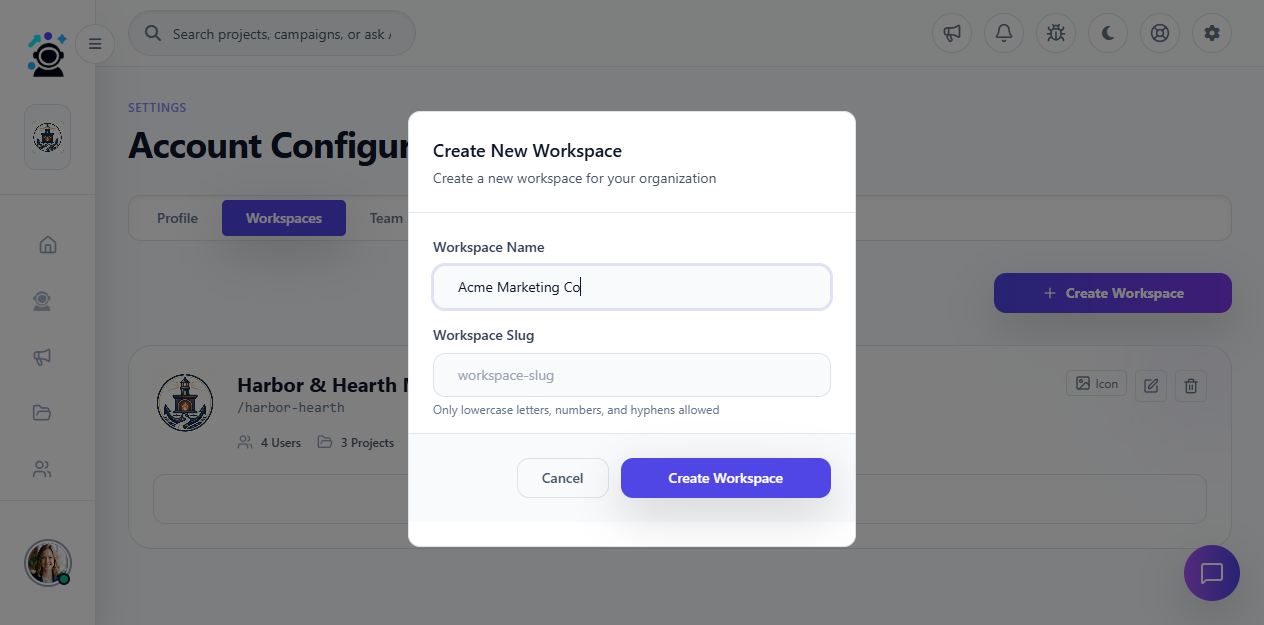
Click the Create Workspace button in the top-right of the settings panel. A form will appear with two fields:
- Workspace Name — The display name for your workspace (e.g., “Acme Marketing Co”)
- Workspace Slug — A URL-friendly identifier auto-generated from the name (e.g., “acme-marketing-co”). This is used internally and in API calls.
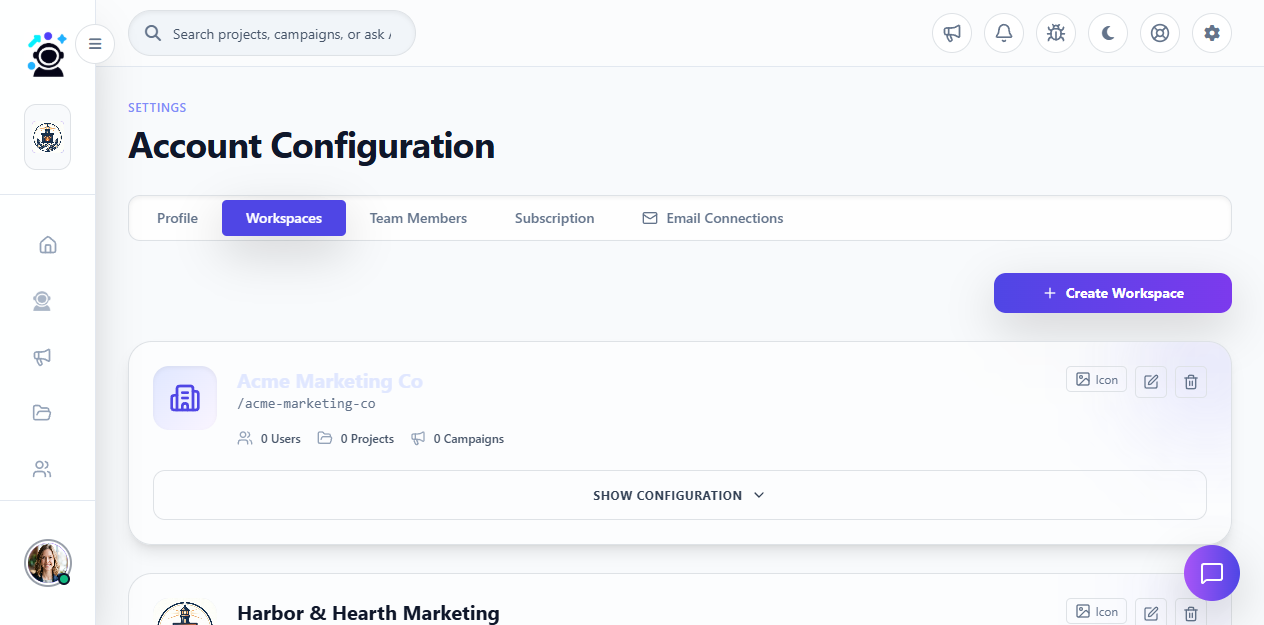
Step 3: Confirm Creation
Click the Create Workspace button. The form closes and your new workspace appears in the workspace list immediately. You can now switch between workspaces using the workspace selector in the sidebar.
Next Steps
- Add team members — Invite collaborators to your workspace with role-based permissions
- Create your first project — Organize campaigns and tasks within a project
- Connect integrations — Link Google Analytics, Search Console, Ads, and social accounts
Each workspace is fully independent — data, settings, and permissions do not cross between workspaces. This keeps client data siloed for agencies and brand data separated for multi-brand businesses.
Was this article helpful?
Your feedback helps improve the documentation experience.