MartechAI workspaces are built for teams. You can invite colleagues, assign roles, and control which workspaces they can access — all from the Account Configuration page.
Navigate to Team Members
- Click the gear icon in the top header bar to open Settings.
- Click Workspace Management under Custom Domain & Tracking Settings.
- Select the Team Members tab.
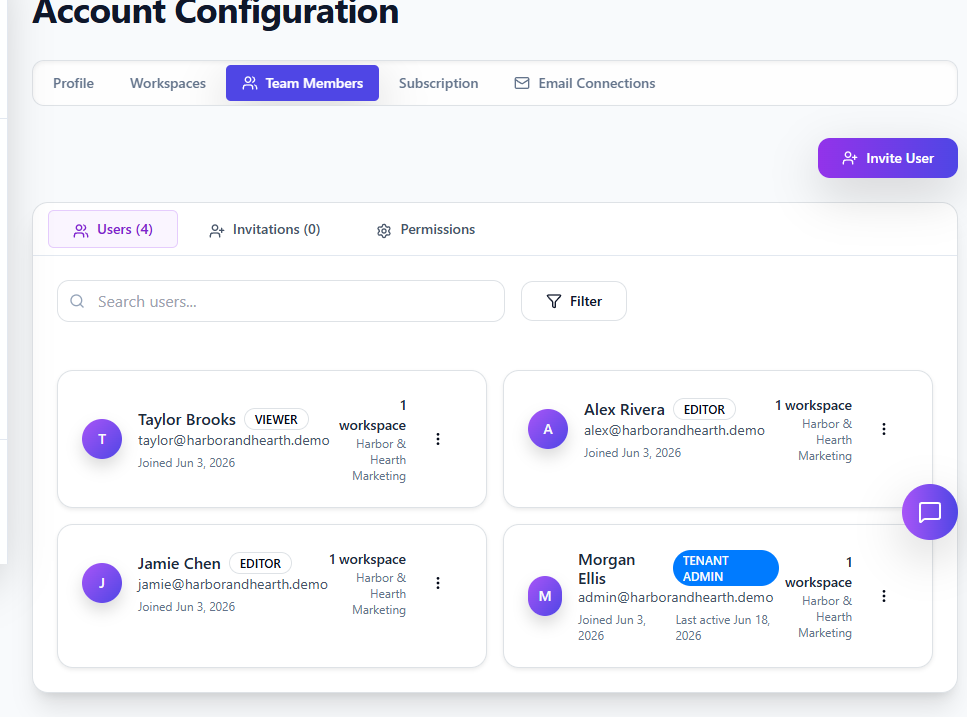
You’ll see your current team members, their roles, and when they joined. Each member card shows their assigned workspace and role badge.
Send an invitation
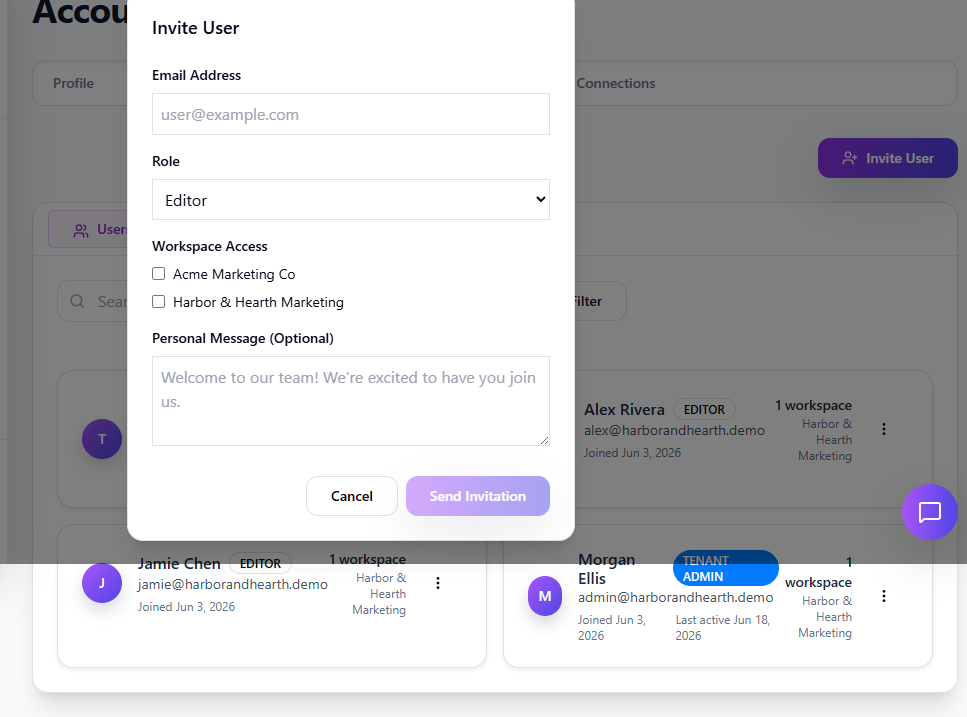
- Click the + Invite User button in the top right.
- Enter the person’s email address.
- Choose their role from the dropdown:
- Viewer — Read-only access to dashboards and reports.
- Editor — Can create and edit campaigns, content, and contacts.
- Admin — Full management access within assigned workspaces.
- Billing — Can manage subscription and payment details.
- Tenant Admin — Full platform access across all workspaces.
- Check the workspaces you want them to access. You must select at least one.
- Optionally, write a personal message that will appear in the invitation email.
- Click Send Invitation.
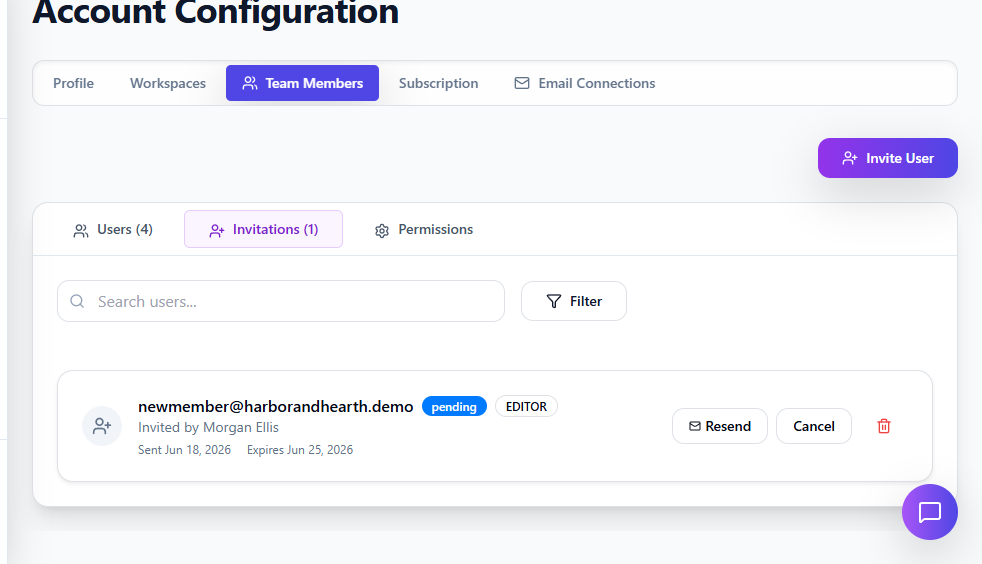
Track pending invitations
After sending, click the Invitations tab to see all pending invites. Each one shows:
- The recipient’s email and assigned role
- Who sent the invitation and when
- When it expires (7 days after sending)
From here you can Resend the invitation email if it got lost, or Cancel the invitation to revoke access before it’s accepted.
What your team member sees
Once you send the invite, the recipient gets an email with a link to join your workspace. They’ll create their own password and land directly in the workspace you assigned them to. If they already have a MartechAI account, the workspace is added to their existing account — no duplicate signup needed.
Pro tip
Use roles strategically. Give content writers an Editor role in the workspace where they create blog posts, but keep them as Viewer in your analytics workspace. Roles are per-invitation, so you can invite the same person to different workspaces with different permissions.
FAQ
What happens when an invitation expires?
Invitations expire after 7 days. The recipient won’t be able to use the link after that. Just click Resend from the Invitations tab and they’ll get a fresh email with a new 7-day window.
Can I change someone’s role after they join?
Yes. Go to the Team Members page, find their card, click the three-dot menu, and select Edit. You can change their role or workspace access at any time.
Does inviting someone count toward my plan’s user limit?
Pending invitations don’t count — only accepted team members do. The Invitations tab shows a separate count so you can track what’s outstanding.
Was this article helpful?
Your feedback helps improve the documentation experience.